Don’t Wait For a Leak To Replace Your Roof
To avoid these needless expenses, replace your roof before it leaks.
It’s one of the biggest and most costly mistakes homeowners make: They pay no mind to an aging roof until they see a leak from the inside. The problem: By the time water damage becomes visible from inside the home, there may already be extensive rot and mildew between the ceiling and roof.
All of a sudden, instead of just replacing shingles or laying down some new pitch and gravel on a rooftop, your contractor may be cutting into drywall or replacing sections of the ceiling and roof. In some cases, you may have to go through a costly mold eradication project.
Reminder: Unless the damage can be traced to a specific wind or weather event, chances are it won’t pay for damages caused by a leaking roof.
Contain the Leak
If you find water dripping from a bulges or discoloration in your ceiling, it’s likely that water is pooling on the other side of that bulge or dark spot. Grab a bucket, trash can, or some other container and place it under the site of the drip or suspected leak. You may even want to consider propping up a board inside the container so the drips hit the board and not the accumulated water. This will minimize the repetitive dripping sound.
Next, take an old screwdriver, locate the center of the bulge where water is accumulating and puncture it right in the middle. Though it might seem strange to punch a hole in your ceiling to stop a leak, the new hole will allow the water to drain smoothly and relieve pressure on the rest of your ceiling. If water accumulates and pools, the entire ceiling could collapse.
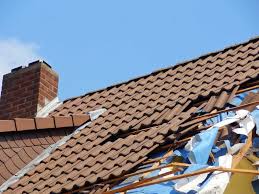
7 Signs You Need a New Roof
Most people don’t really think about the roof over their heads…until it springs a leak! Don’t wait until water is pouring through the ceiling and you have to break out the buckets to pay attention to your roof.
Start Inside
If you think you might need a new roof, the first place to check isn’t your home exterior—it’s your attic. So arm yourself with a flashlight and climb up under the eaves. Look for beams of light coming through the top of the house or stains and streaks, which signal a leaky roof.
Paper Trai
Review your home improvement records to see how long ago the roof was replaced or reshingled. Knowing when a roof was installed (and what it’s made of) offers insight into how much life it has left. For instance, a typical asphalt shingle roof lasts 20 to 25 years, while a roof installed over an existing layer of shingles should be replaced after 20 years.
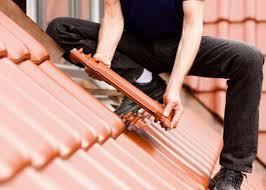
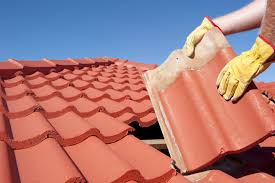
Check Shingles
Keep an eye on your rooftop to make sure its in ship-shape, especially after heavy storms. Shingles should lie flat against the roof; if you find patches that are cracked, damaged, or buckling, then repairs are in order. While you’re at it, check the gutters and downspouts for shingle granules—a roof that is losing a lot of granules may be at the end of its useful life.
Flash Forward
The flashing around vents, skylights, and chimneys seals the seams of the roof from rain and weather. Examine these points make sure there are no cracks or breaks, which could lead to leaks. In older homes, flashing is often made of roof cement or tar, but it’s a good idea to upgrade to a metal flashing system for added durability.
Rescue From Rot
A droopy, sagging roof is one that surely needs replacing before further damage occurs to your home. Check the surface for signs of trapped moisture, rotting boards, or sagging spots—especially at the lowest points in the roof.
Unwanted Houseplants
Moss can look great in a shady corner of your yard but on a roof, it spells trouble. Moss (and likewise mold and fungi) indicate there may be trapped moisture, which can ruin a roof. To do away with moss that collects in shaded corners of your roof, use a stiff brush but be careful to address any underlying problems.
Don’t Panic
Just because you have a few damaged shingles or a bit of a leak, don’t automatically assume that you need a whole new roof. If your roof has been properly installed and is younger than 15 or 20 years old, it may get by with repairs rather than a full replacement. When in doubt, contact a licensed roofing contractor to get a professional opinion.
Roof Leak Emergency
Here is how to make an emergency cover for your leaking roof from plastic sheeting and 2 by 4s:
- Partially unroll or unfold enough heavy (6-mil) polyethylene sheeting to cover the leaking section of roof, from eaves to peak; add about 4 feet extra, and cut it with a utility knife. Wrap one end around a 2 by 4 that is as long as the plastic’s width; staple the plastic along the 2 by 4. Sandwich the assembly with a second 2 by 4, and nail the boards together with three or four 3-inch or 3 1/4-inch common nails.
- Place the sandwiched end of the plastic along the eaves. Stretch the sheeting from eaves to ridge, running it over the top of the ridge and down the other side a few feet.
- Sandwich the top end of the sheeting with another pair of 2 by 4s so the wind will not carry it away. Do not nail any part of this assembly to the roof.
What to Do When Your Ceiling Has Water Damage
There are few feelings worse than being confronted with water damage. If you have a ceiling that’s water stained, peeling and or cracked, here’s what to do.
Stabilize the Situation
The first step is to stabilize the area around the leak. Move valuables out of the area and then break out a bucket and tarp to catch and contain any water that’s built up behind the ceiling. Chances are your ceiling covering is drywall, which will absorb or disperse the water. You’re better off controlling where water comes through the ceiling. Do this by creating a small hole at the center of the leak using an awl, screwdriver, or similar object, so that the water will pass though that controlled opening and into your bucket.
Track Down and Repair
Next, it’s time to track down and repair the source. Water can travel a surprising distance from the initial leak, and roof leaks in particular can be tough to isolate. Even in an apparently simple situation, such as when a bathroom is directly above the stain, there are still a number of potential sources for the water. It could be a leaking drain, loose supply line, or missing caulk.
You may need to cut a hole in the ceiling in order to see where the water is coming from, and if you’re having trouble re-creating the leak, you might try the old trick of laying sheets toilet paper along pipes and ceiling joists. The toilet paper will clearly show any reaction to moisture, allowing you to narrow the scope of your search.
Dry the Damage
While repairing the source of the leak, allow any affected materials to thoroughly dry. This is especially true of the ceiling cavity because moisture trapped behind the drywall will be prone to developing mold. A minor leak may dry up on its own, but, for larger leaks, it’s often best to open up a section of the ceiling and air it out with the aid of a fan.
Repair the Ceiling
Depending on the leak, this may involve simply touching up with a bit of Spackle and paint, or it might mean replacing and repainting the entire ceiling. Keep in mind that it’s often easier to simply remove damaged drywall back to dry material. This often exposes ceiling joists, which makes hanging patches easier. The same goes for painting, as it’s often easier to feather new paint into a larger area, or even paint the whole ceiling, in the case of a larger leak.