How to Stop a Leaking Roof During Heavy Rains
A roof that leaks is a problem in any weather, but a roof that suddenly begins to leak during a heavy rainstorm can quickly turn into an emergency. With heavy runoff, water may start seeping through a hole that has been there for a while and drip onto the ceiling. By the time you notice water dripping in the house, the drywall has likely been saturated. If you don’t do something right away, it could crumble. Finding a leak can take time. You need to staunch the dripping and make an emergency repair as quickly as possible.
Emergency Roof Patching
Go into the attic, if you have access, and clear insulation off the wet ceiling drywall. Sponge off any standing water. Lay a piece of plywood across the joists and put a bucket on the plywood to catch the water. Don’t put the bucket directly on the drywall — it may fall through when it fills with water.
Follow the leak back to the point at which it enters the roof. This could be far from the point where it’s dripping onto the ceiling. You can typically trace the the path along a rafter, but water sometimes follows the underside of the roof deck.
Make a temporary patch with roofing tar and a piece of shingle or plywood. Trowel the roofing tar into the leak on the underside of the roof deck, using a putty knife. Push the shingle or plywood into the tar and trowel more roofing tar around the edges of the patch.
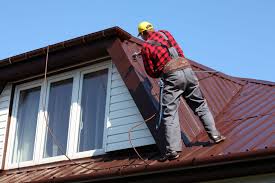
Measure the distance of the leak from the gable and from the ridge, while you’re in the attic, using a tape measure. Wait for the rain to let up before you attempt to go on the roof. Put on rubber-soled shoes, go on the roof and measure the same dimensions on the roof. Fortify the undersides of the shingles in the vicinity of the leak with more roofing tar. Don’t attempt to access the roof without taking adequate safety precautions.
Emergency Roof Covering
Prepare a plastic roof cover if you can’t get in the attic and have no way of determining the exact location of the leak. Use a 4-foot roll of 6-mil polyethylene plastic.
Unroll the plastic but don’t unfold it. Measure enough to cover a section of the roof from the eave to the ridge, add an extra 4 feet, and cut it from the roll with a utility knife. Unfold the plastic just one fold to make a strip 8 feet wide.
Roll one end of the plastic around an 8-foot two-by-four and staple the plastic to the wood. Cut another 8-foot two-by-four and nail it to the first, with the plastic sandwiched between the two pieces of wood.
Go on the roof and place the wood along the eaves. Stretch the plastic over the ridge, covering the approximate location of the leak. Staple the other end to another two-by-four and nail a fourth two-by-four to that one. Allow that pair of two-by-fours to hang down on the opposite side of the ridge.
How Should I Protect my Roof While I am Waiting for Repairs?
You may have once come across a damaged shingle or a hole in your roof, and called for professional help immediately; just when you were waiting for the expert to arrive and fix your roof, rain starts to pour outside! Panic starts to grip you, and you start to wonder what to do now? After all, how can you stop the rainfall from getting into your house? Is there a way to stop a roof leak? Of course, there is. In fact, there are many ways to put a halt to your leaking roof temporarily. Read on to find out all about them..
First Things First
Make sure you don’t panic. Just take one thing at a time. It’s really important to help minimize any interior damage that the roof leak may cause. Be sure to get some buckets to help catch the water and then locate the leak. You can do this by checking if the ceiling boards are absorbing moisture, or by looking for drips coming from the ceiling. You want to ensure that water is not accumulating above the ceiling boards as the weight of this water could cause your ceiling to collapse. If you can see a small dripping area, you may need to create a small hole to allow the water to drain out. Make sure you put a bucket underneath to catch the water. The next thing you need to do is to locate the source of the leak. Remember to always check in your attic for the leak if you have one.

Ways to Stop a Roof Leak Temporarily
- Tarp Covering
First and foremost, head to your attic – the most common source of the leak – and cover the hole using a tarp. Make sure that the tarp is long enough to cover the ridge of the roof.
If you are experiencing high rainfall, you will need to place a tarp over the hole twice or even multiple times. To do this, secure the tarp over the tarp that has already been there and secured over the hole. If in case, there is no tarp, you can use strong and durable duct tape.
- Use Plastic Roofing Cement
If you don’t already have plastic roofing cement, then you will have to purchase it for emergency use, for instance for a roof leak. It is arguably the best temporary roof leak fix that you can go for during heavy rainfall or snowfall.
Plastic roofing effectively helps seal tiny holes and cracks in roofing and prevent the water from entering your house. For a proper application, make sure that you have a roofing trowel, caulk gun, and putty knife.
- Use Roofing Tape
Easily available at any hardware store or home improvement shop, roofing tape is typically applied to the inner part of the roof decking to limit the water flow inside your house. To fix the leak temporarily, ensure that you are equipped with a ladder to properly stand on while applying roofing repair tape on the hole. This makes the temporary roof leak fix long-lasting than any other method – tarp tape or duct tape.
Find the Source of the Roof Leak
Finding the source of the leak can be extremely frustrating, but if you don’t find the source of the leak, any repairs or temporary fixes you do are going to be useless. Water can travel far from the original source and cause damage elsewhere.
Start by locating the roof leak on the inside of your house. You want to make sure that the source of the leak is the roof and not due to a problem in other parts of your house. Some of the culprits for household leaks include plumbing, heating and cooling units, condensations, pest infestation or even clogged gutters.
Do some exploration and investigation. The leak in your ceiling or wall will often not align. Removing damaged drywall or ceiling tiles to see where the leak is coming from will often help you easier find the source of the leak as well as dry out the water-damaged space.
Minimizing Damage on the Roof Top
As roof leaks occur, it becomes necessary to attend to the source of the problem: the roof top. Each type of roof requires a different strategy for minimizing damage and completing temporary or permanent repair solutions.
Here is an overview of some of the weak points of each roof system, as well as some of the more common emergency repair tactics.
NOTE: Be careful to not walk on your roof surface. All wet roofs are slippery, and some “dry” roofing may be slippery due to algae or mildew. Rotted decking is often hidden from sight by the roof material and can collapse under human weight. Pipes and vents can cause tripping – and metal roofs are very slippery at all times. If you have a flat roof section, it is advised to set up the ladder there as it is easier to get on/off a ladder from a flat surface.
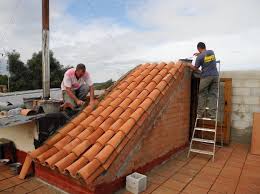
Tile Roof
Tiles do not stop water from entering the roof system. The true water barrier is the underlayment, aided by flashing. Because of this, trying to seal tile cracks will not stop the leak in most cases.
If it is impractical to cover the area for the cause of a roof leak, look for common leak areas:
- Penetrations
- Walls
- Skylights
- Valley
- Chimneys
If these are nearby or just above where the leak is entering, they may be the cause of water seepage. Tiles are easily removed and replaced, but care must be taken not to damage the underlayment when removing tiles. After tiles are removed, the area should be inspected for cracks, separation, holes, etc. where the water could be entering.
Metal Roof
Metal roofs are much easier to investigate for leaking issues. In most cases, the leak is caused from one of three areas:
- Fasteners: As screws age, their washer deteriorates. Simply seal the entire fastener using silicone caulking. This is only a temporary repair and will rust out the metal if not fixed properly.
- Penetrations: Any area where a hold is cut through the metal panels is a potential leak. If not flashed correctly, these areas may cause leaks, even with sealants. Although adding sealant may stop the leak temporarily, the sealants must be cleaned to avoid trapping moisture, which will cause rust.
- Seam and Flashing Overlaps: Where two metal flashings or panels overlap there is a chance for water to “wick” up the transition and cause seepage.
Shingle Roof
On pitched roofs, it is best to cover the affected area with plastic or a tarp. Make sure the tarp is extended over the ridgeline. Otherwise water will simply run under the tarp and continue to leak. To hold down the tarp, feel free to use any type of fastener you may have on hand. As a roofer, it is very easy for us to replace those shingles and seal the hole. You will not be creating new leaks as long as the fastener stays secure. For this task, screws often work the best.
Flat Roof
Tarps and plastic are rarely a good way to stop water seepage on these roof types – since most flat roofs have either a pitch roof or parapet/mansard at the perimeter, the water will simply flow under the tarp. The best way to stop water is to broom sitting water off the roof and look for areas of cracking or separation. Obvious areas of concern are perimeter flashings, boots, vents, pitch pans, tie-ins to pitch roofs or walls and drains. Drains are almost impossible to temporarily repair due to the fact that the entire roof’s watershed is designed to flow towards the drain. If the roof drains are causing the leak, a full repair project may be the only solution.